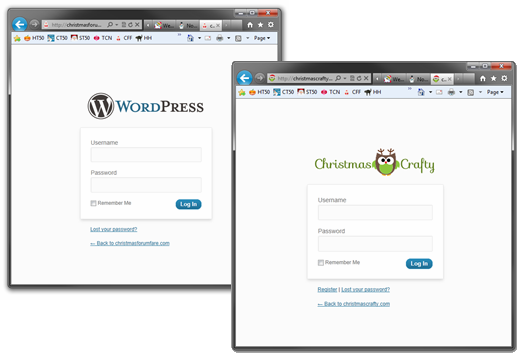
By default, every WordPress powered site has a login page located at http://yoursite/wp-login.php. This default login page features the WordPress logo linked to wordpress.org with the title attribute ‘powered by wordpress’.
Did you know that you can change this? It’s easy and you don’t need to install a plugin to do it (not that plugins are a bad thing, I love them!).

If you’d rather the login page display your own site logo, you can set it up pretty easily. I’ll show you how to change this with just a few simple steps. But first things first, let me point out that we aren’t going to do anything elaborate in this tutorial, we are simply going to replace the default WordPress logo with our own same sized logo and change the URL info.
Here we go…
Get your new login page logo or image ready, the default WordPress image is 274w X 63h. Upload this image to your server, or you can upload it to your WordPress media library. In my example below, I placed my custom logo in my theme’s images folder.
Open your active theme’s functions.php file and paste the following code – Or if you’re using your functionality plugin, add it there.
Change the background URL to point to your new login logo, as well as the link and ‘powered by’ to match your own site. Save your changes.
// Custom login page
function custom_login_logo() {
	echo '<style type="text/css">h1 a { background: url('.get_bloginfo('template_directory').'/images/logo-login.png) 50% 50% no-repeat !important; }</style>';
        echo '<script type="text/javascript">
        function loginalt() {
        var changeLink = document.getElementById(\'login\').innerHTML;
        changeLink = changeLink.replace("http://wordpress.org/", "https://christmaswebmaster.com");
        changeLink = changeLink.replace("Powered by WordPress", "Christmas Webmaster");
        document.getElementById(\'login\').innerHTML = changeLink;
        }
        window.onload=loginalt;
        </script>';
}
add_action('login_head', 'custom_login_logo');
Now all you need to do is log out and see your new logo in action!
